
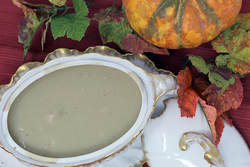
 I’ll be honest, every year I am always shocked by the stacks of glass jars of gravy prominently displayed at the grocery store around Thanksgiving. I’m going to let you in on a little secret, if you cook a turkey, you have all the makings for gravy, and it’s pretty easy to make and tastes so much better than that stuff out of a jar. The technique is pretty simple, and translates to all kinds of gravy once you know the basics. There are three major components to gravy: some kind of fat, flour, and some kind of liquid. The fat can be the rendered fat from your protein, can be butter, or can be vegetable or olive oil depending on the use. Then flour, the all-purpose in your cabinet is what you want, and then liquid. For turkey gravy, you are going to use some combination of the pan drippings and either homemade turkey stock or a good-quality, low-sodium chicken broth. For years, my dad used chicken broth in the stuffing but took the little bag of giblets, washed them, and put them in a pan with an onion, celery, carrots, a bay leaf, and some poultry seasoning, and let that boil away on the back of the stove. Several hours later, he would strain the liquid and use the broth to augment the turkey drippings, and would dice the giblets to stir into his gravy. Today, I usually make a gallon of browned turkey stock. The grocery store has helpfully started selling packages of necks, wings, and drumsticks. I use this stock in the two kinds of stuffing as well as to make my gravy. I’ve included the recipe for both my traditional gravy and the browned turkey stock below. Browned Turkey Stock
Yield – 1 gallon INGREDIENTS 1 package turkey necks 1 package turkey wings 1 package turkey drumsticks Olive oil Salt and Pepper 3 medium onions, peeled and quartered 4 large carrots, peeled and roughly chopped 4 stalks celery, peeled and roughly chopped ¼ cup parsley 4 sprigs fresh thyme 3 bay leaves 1 tbsp whole peppercorns Preheat the oven to 375 degrees. In a large roasting pan, lightly oil the turkey parts and season with salt and pepper. Roast the turkey parts for 45 minutes, until nicely browned. After 45 minutes, place the turkey parts in a large stock pot and add the remaining ingredients as well as 1 gallon of cold water. Bring the water to a boil, then turn the heat down to medium low and simmer covered for 1 hour. Strain the stock, then cool in an ice bath in your sink before refrigerating. You can discard the turkey parts or allow them to cool and remove the meat to use in your turkey gravy. The stock will keep for 3 days in the refrigerator or up to 2 months in the freezer. Turkey Gravy Difficulty - Easy Yield – 5 cups INGREDIENTS 6 tbsps turkey fat ½ cup plus 1 tbsp all-purpose flour 4 ½ cups drippings and/or turkey stock or gravy Salt and Pepper to taste To prepare the gravy: After removing your turkey from your choice of cooking vessel, you will be left with turkey drippings in the bottom of your pan. Pour those drippings into a glass measuring cup. You will be able to see the fat float to the top. Carefully remove 6 tablespoons of fat into a medium sauce pan. Should you find yourself with less than 6 tablespoons, you can add butter to make up the difference. You can discard the remaining turkey fat, or keep for other uses, including fresh gravy for the next day. What is left in the bottom of the glass measuring cup is the concentrated turkey juices. To those, add enough chicken broth or browned turkey stock to make 4 ½ cups of liquid. Turn the medium saucepan to medium high heat, then whisk in the flour. Cook the flour and fat mixture (roux) for 2-3 minutes, then slowly whisk in the drippings. Turn the heat to low and allow to simmer for 5-10 minutes, until the mixture has thickened. Check for salt and pepper, and season accordingly. You can add the giblets, or small bits of chopped turkey if you choose. In the South, it is traditional in some houses to add a chopped up hard-boiled egg or two to the gravy, but I will leave that addition up to you.
3 Comments
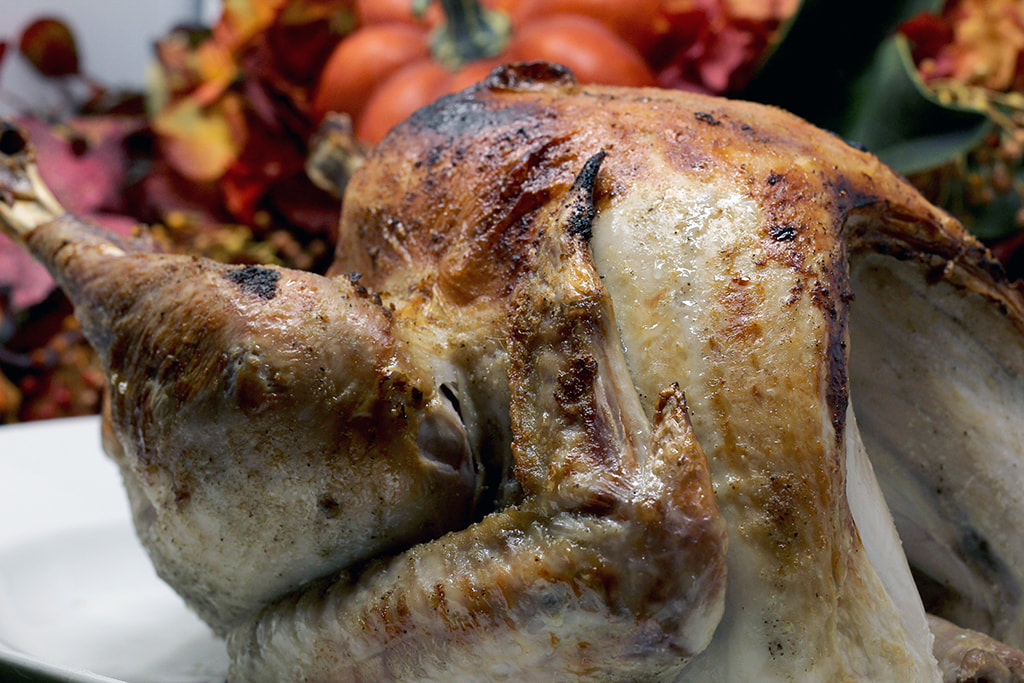
Roasted Turkey
Difficulty – Medium Servers – 8 to 10 INGREDIENTS 1 – 13 lb young turkey, thawed Dr. Scott’s Turkey Schmear 1/3 cup shortening 2 tbsps olive oil 1 tsp onion powder ½ tsp garlic powder ½ tsp poultry seasoning ¼ tsp kosher salt ¼ tsp black pepper Remove the wrapping as well as the bag of innards from your turkey. Rinse and pat dry. In a small bowl, mix ingredients for the turkey schmear. On a large flat service, take two large lengths of wide, heavy-duty foil, about 3 feet long. Lay them on top of each other, and fold the long edge over twice, about ½ an inch each time, to make a seam. Then open the two. You should now have a large square of foil. Take a third piece of foil, and lay it over the seam. Place the turkey in the center of the foil. To prep the turkey, we fold the wings back, and then proceed to generously rub the exterior of the bird with the turkey schmear. If not stuffing the bird, you can remove the large pieces of fat at the rear and front of the bird. With kitchen twine, we tie the legs together. Once the turkey is prepped, we carefully pull the foil up around the bird. It will resemble a foil bowl. Take a fourth piece of foil, and place it at the top. We then will carefully crimp the foil together to make a sealed packet, so that the bird can steam in its own juices. Place the foil encased bird in a heavy bottomed roasting pan. At this point it can be refrigerated, or it is ready for the oven. Preheat your oven to 450 degrees. A 13-pound bird cooks for right at 2 hours according to our method. After 1 hour and 40 minutes, remove the bird from the oven and remove the top piece of foil and push the sides back to allow the bird to brown. Be careful when opening it initially as a plump of steam will be released. Return the turkey to the oven for another 20 minutes to let it finish cooking and get nicely browned. A digital thermometer is your friend, and you are looking for 165 degrees in the center of the breast. Once the bird has reached 165 degrees, remove it from the oven, and let it rest for about 20 minutes before carving. The beauty of this method is the minimal cleanup and all the wonderful juices which have collected in the bottom of your foil “bowl”, just waiting to make fabulous gravy! Cooking Times – 450 degrees Unstuffed – 8 to 10 minutes per pound Stuffed – 10-12 minutes per pound
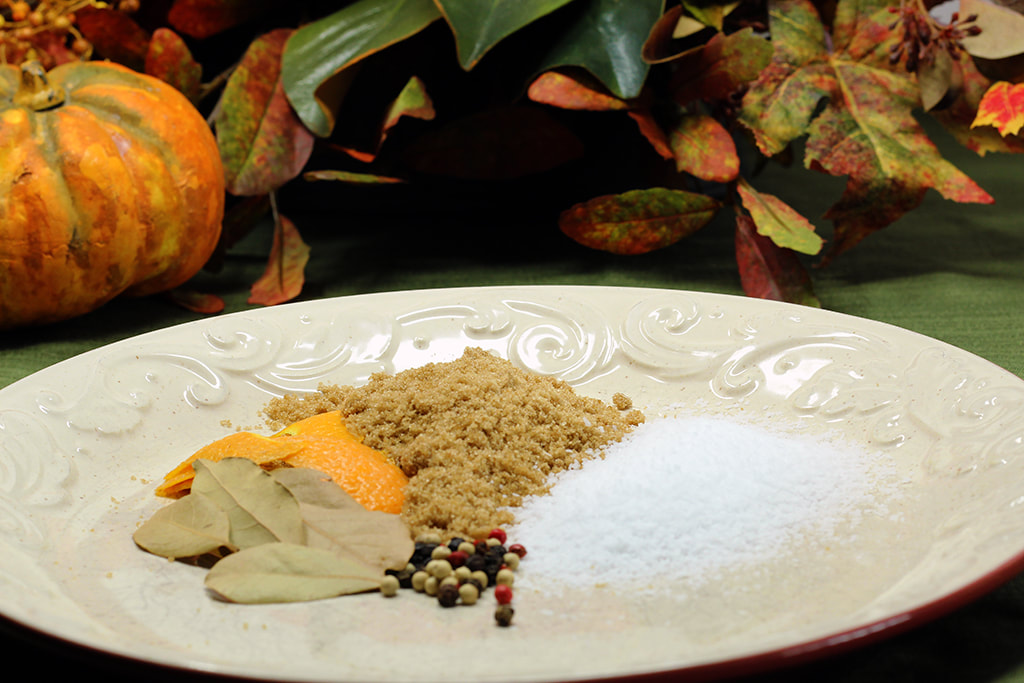
Turkey Brine
Difficulty – Easy INGREDIENTS 1 cup kosher salt ½ cup brown sugar 1 gallon water 1 tbsp black peppercorns 3 to 4 wide strips of fresh orange zest 4 bay leaves In a large pot bring all the ingredients to a boil over medium-high heat, stirring occasionally to let the sugar and salt dissolve. Allow to cool completely. In a large container, a 5-gallon bucket works best, combine the brine with an additional gallon of ice water. Submerge your turkey, which has been rinsed and the package of innards removed. Allow the turkey to brine for 8 to 12 hours. Once your turkey has brined, remove it from the brine, and rinse and dry it before continuing to prepare it for your preferred method of cooking.
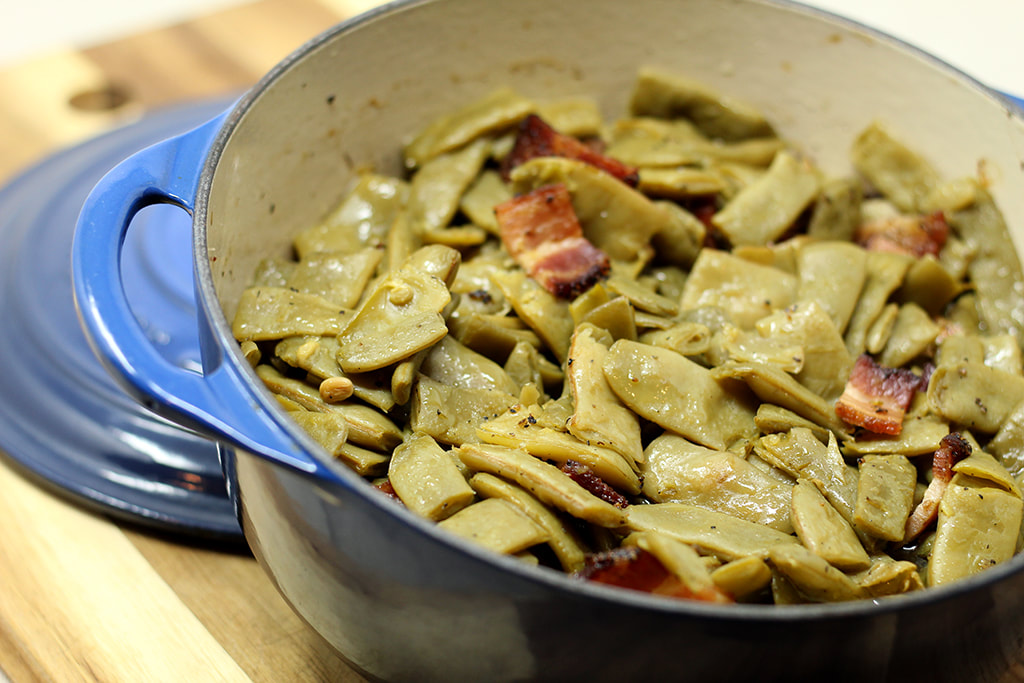
Southern-Style Green Beans
Difficulty – Easy Feeds – 6-8 INGREDIENTS 4 slices thick-Cut bacon (I tend to like the peppered bacon here) 2 – 28 oz cans Italian-cut green beans 4 tbsps butter, cut into large chunks 1 tsp ham base 1 tsp kosher salt ½ tsp black pepper Prepare the Bacon Preheat the oven to 375 degrees. Place bacon on a foil-lined baking tray. Bake for 15-18 minutes, until golden brown. Remove the cooked bacon from the pan and drain on paper towels, then chop into bite-sized pieces. Rinse and drain your green beans. Add the bacon, butter, ham base, salt, and pepper along with 1 cup of water. Cover and place on the stove on medium low heat or in a medium slow cooker on low. Allow to simmer at least a half an hour.
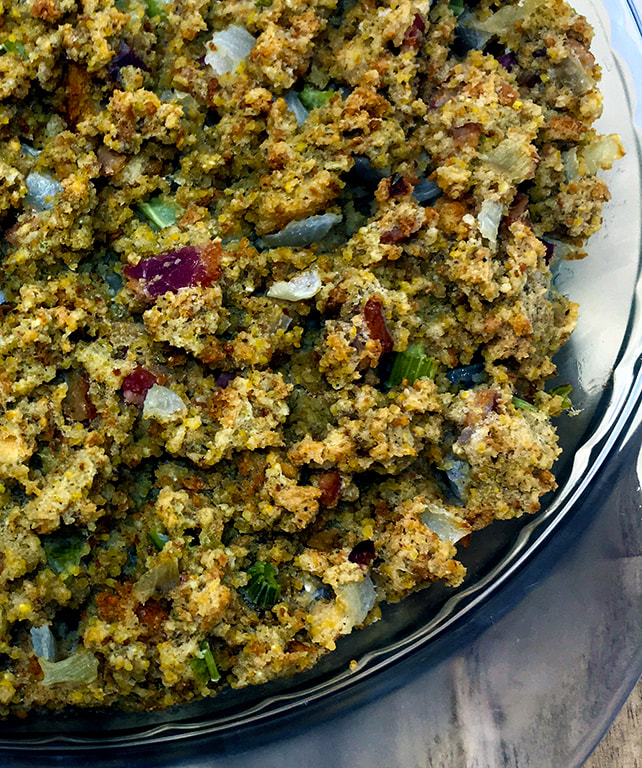
Cornbread Dressing
Difficulty – Easy Feeds – 6 – 8 INGREDIENTS 1 – 14 oz bag of Cornbread Dressing (I like Pepperidge Farms) 4 slices thick-cut bacon 6 tbsps butter 1 cup diced onion ½ cup diced celery 1 tsp poultry seasoning 1 tsp kosher salt ½ tsp black pepper 2 ½ cups turkey stock or chicken broth* *I typically make Turkey Stock on Tuesday of Thanksgiving week but any low sodium chicken broth works well here Prepare the Bacon Preheat your oven to 375 degrees. Place bacon on a foil lined baking tray. Bake for 15-18 minutes, until golden brown. Remove the cooked bacon from the pan and drain on paper towels, then chop into bite-sized pieces. In a medium skillet, melt the butter. Sauté the onion and celery until tender, 6-8 minutes. In a large bowl, combine dressing, and seasonings. Stir in the bacon, onion, celery, and butter. Add broth. Stir until the vegetables and bacon are well distributed and the stuffing is moistened. Place in a 9” round baking dish. You can refrigerate the dressing at this point for baking later. To Bake: Preheat oven to 350 degrees. Bake uncovered for 35-40 minutes, until the dressing is heated through and slightly crispy on the top.
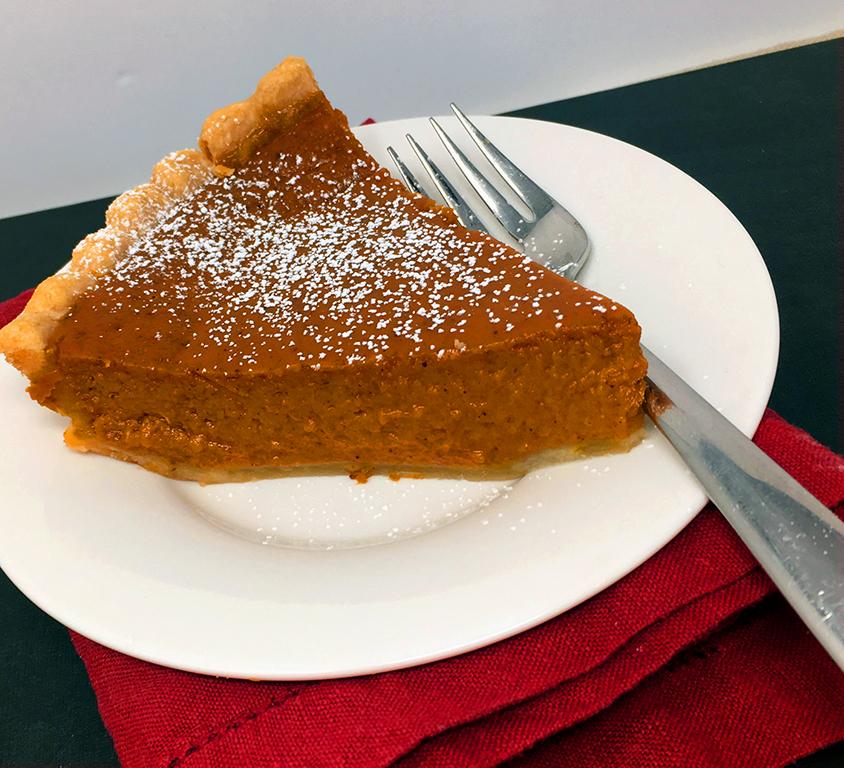
Pilgrim Pumpkin Pie
adapted from The Good Housekeeping Cookbook ©1963 Difficulty – Easy Feeds – 8 -10 INGREDIENTS 1 – 9” Deep Dish Pie Shell 1 cup granulated sugar 1 ½ tsps ground cinnamon ½ tsp ground nutmeg ½ tsp ground ginger ½ tsp ground allspice ½ tsp ground cloves ½ tsp kosher salt 1 – 15 oz can canned pumpkin 1 – 12 oz can evaporated milk 2 large eggs Preheat oven to 425 degrees. Line a baking pan with foil, and place the pie shell in the center. In a medium bowl combine sugar, cinnamon, nutmeg, ginger, allspice, cloves, and salt. In the bowl of a mixer, add the pumpkin. Add the sugar and spices, milk, and eggs. Mix until smooth, then pour into the pie shell. Place in preheated oven, and bake for 15 minutes. After 15 minutes, turn your oven to 350 degrees for 30-35 more minutes, until the custard is just set. To avoid the unsightly cracks that form from the pie cooling too quickly, turn your oven off, and open the door about 4 inch, leaving the pie still in the oven. This will allow the pie to start to cool slowly and avoid thermal shock. After 30 minutes, remove from the oven and allow to cool completely.
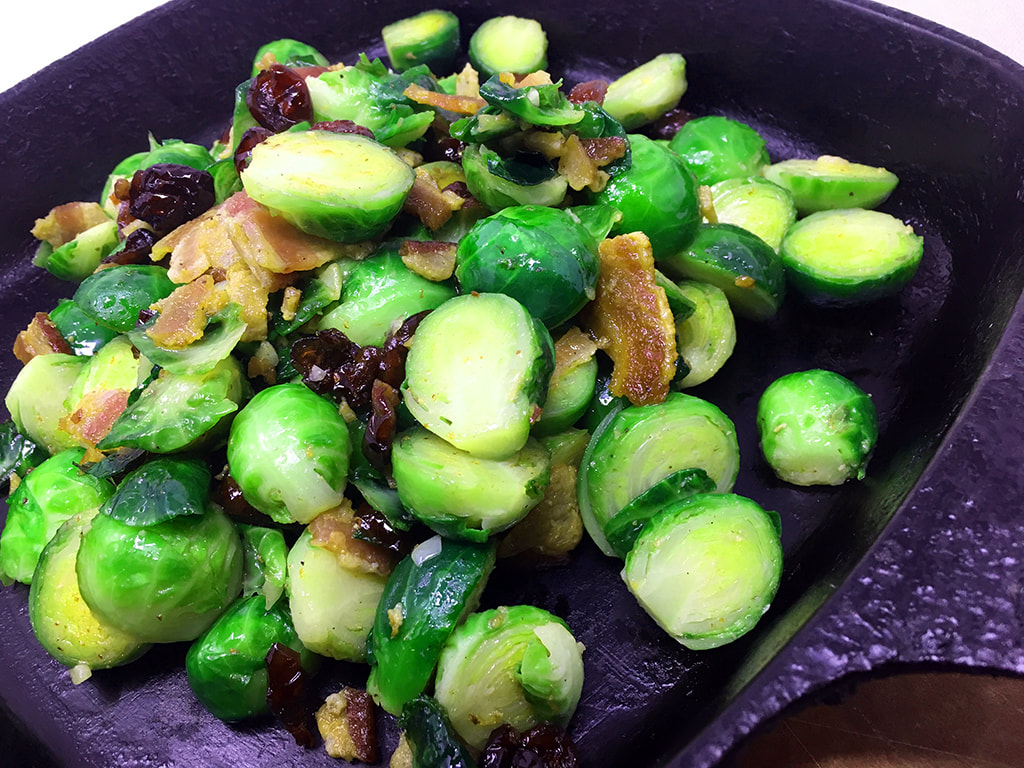
Brussel Sprouts with Bacon and Bourbon
Difficulty – Medium Yield – 4 to 6 Servings INGREDIENTS 1 lb fresh Brussel sprouts 4 slices thick-cut bacon 1 tbsp unsalted butter 1 clove garlic, minced 2 tbsps bourbon 1 tsp kosher salt ½ tsp black pepper ¼ cup dried cranberries Prepare the Bacon: Preheat your oven to 375 degrees. Place bacon on a foil lined baking tray. Bake for 15-18 minutes until golden brown. Remove the cooked bacon from the pan and drain on paper towels, then chop into bite-sized pieces. Reserve 1 tablespoon bacon fat for sprouts. While the bacon is cooking, prep the Brussel sprouts by removing the stems and cutting in half. If very large, quarter the sprouts. Bring a medium pot of water to a boil. Add a healthy pinch of salt to the water, and cook the Brussel sprouts for 3 minutes, then drain and place in a bowl of ice water to stop the cooking. In a large skillet or sauté pan, melt butter with reserved bacon fat. Add minced garlic and bacon, cook for 1-2 minutes, until fragrant. Drain the Brussel sprouts, and pat dry with a paper towel, then add them to the pan. Season the Brussel sprouts with salt and pepper. Cook them until most of their water has evaporated, then deglaze the pan with bourbon. Continue to cook for 2-3 more minutes, until the Brussel sprouts are tender, then add the cranberries.
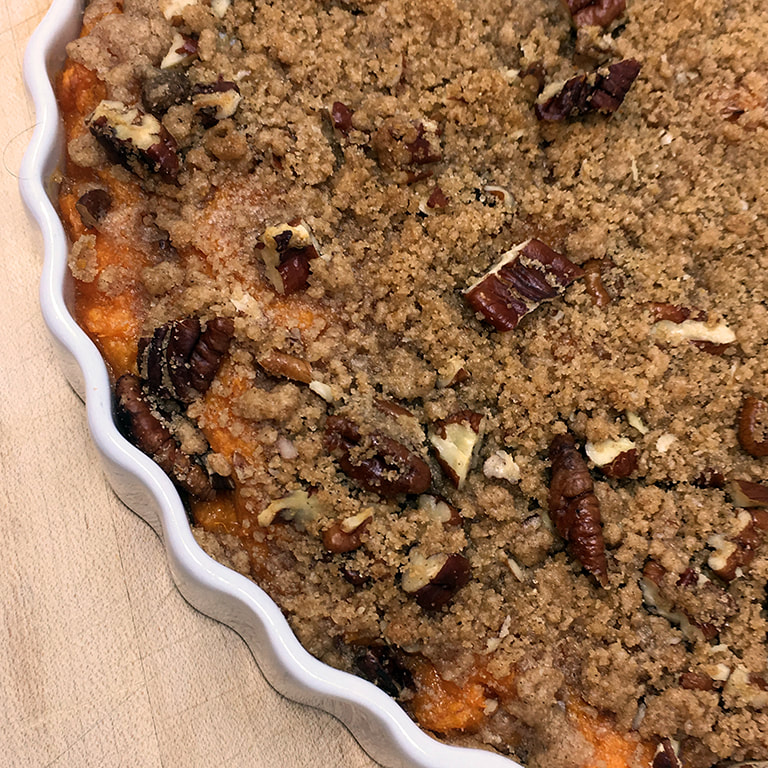
Sweet Potato Soufflé
Difficulty - Medium Yield - 6 to 8 servings INGREDIENTS 3 pounds Sweet Potatoes (3 to 4 potatoes) 2 tbsps unsalted butter 1/2 cup granulated sugar 1/4 cup milk 2 large eggs 1 tsp vanilla extract 1/2 tsp kosher salt Topping 1/3 cup all-purpose flour 1/4 cup plus 2 tbsps brown sugar 1/2 tsp ground cinnamon 1/4 tsp ground nutmeg 3 tbsps unsalted butter 1/3 cup chopped pecans Preheat the oven to 400 degrees. Line a baking pan with foil. Wash sweet potatoes, and pierce them with a knife 3 to 4 times. Place on baking sheet and bake for 45 minutes to 1 hour, until they are nice and soft and have shrunk from their skin. Cool at least an hour, until they are cool enough to comfortably handle. Once the sweet potatoes can be handles, peel away the skin, using a paring knife to remove any of the stubborn pieces. Place in the bowl of a stand mixer. Add butter, sugar, milk, eggs, vanilla, and soft. With the paddle attachment, whip the sweet potatoes until smooth. Place in the bottom of a 9" cake pan. In a separate bowl combine flour, brown sugar, cinnamon, and nutmeg. Cut cold butter into small pieces, and using a pastry cutter work butter into the sugar and flour mixture until it resembles wet sand. Add the pecan pieces, the spread over the top of the sweet potato mixture. Reduce oven temperature to 350 degrees, and bake for 40-45 minutes, until the sweet potatoes are set and the crisp topping is lightly browns.
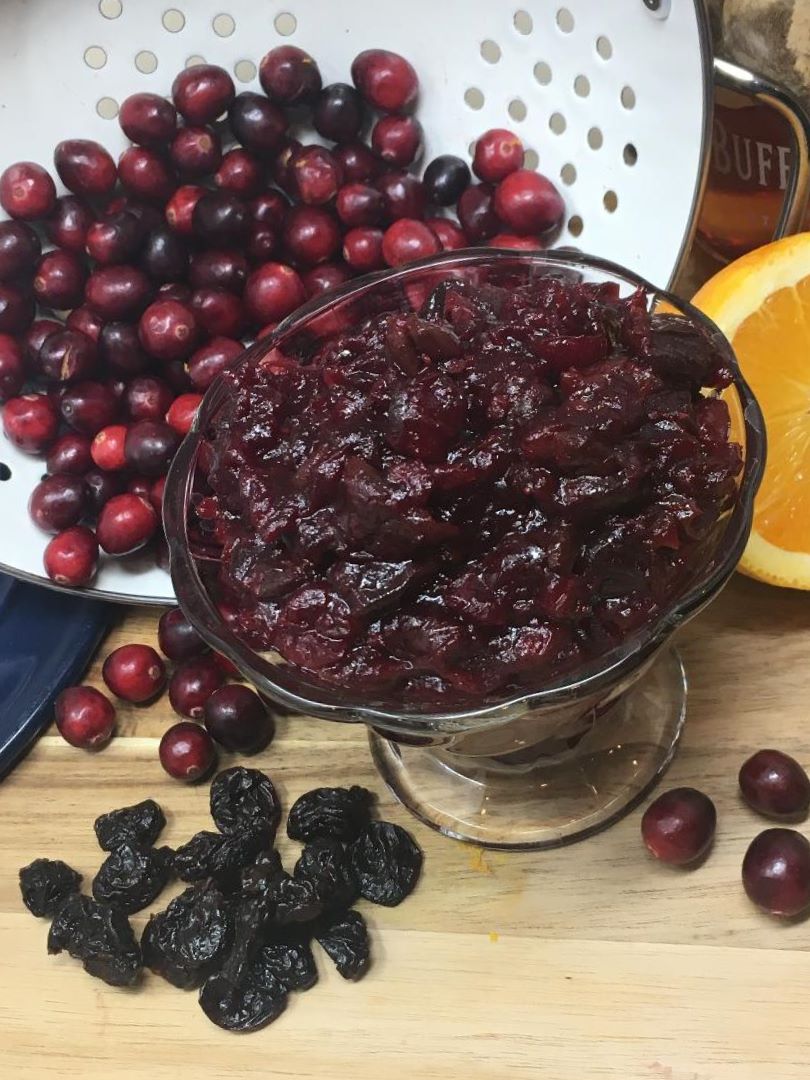
Dad's Cranberry Sauce
Difficulty - Easy Yield - 3 cups INGREDIENTS 2 - 12 oz bags fresh cranberries 1 1/2 cups granulated sugar 1 1/2 cups water Wash cranberries well, and discard any soft or broken berries. In a large heavy bottomed Dutch oven, combine cranberries, sugar, and water. Bring to a boil over medium high heat, stirring frequently. Once the berries start to pop, turn the heat down to low. Continue to cook until the berries have all broken down and the sauce has thickened to the consistency of jam. Old Fashioned Cranberry Sauce Difficulty - Easy Yield - 4 cups INGREDIENTS 2 - 12 oz bags fresh cranberries 1 cup granulated sugar 1 cup water 1 cup orange juice 1 tsp orange zest 1/2 cup bourbon 2 cups dried cherries Wash cranberries well, and discard any soft or broken berries. In a large heavy bottomed Dutch oven, combine cranberries, sugar, water, orange juice and zest, bourbon, and dried cherries. Bring to a boil over medium high heat, stirring frequently. Once the berries start to pop, turn the heat down to low. Continue to cook until the berries have all broken down and the sauce has thickened to the consistency of jam.
Difficulty - Easy
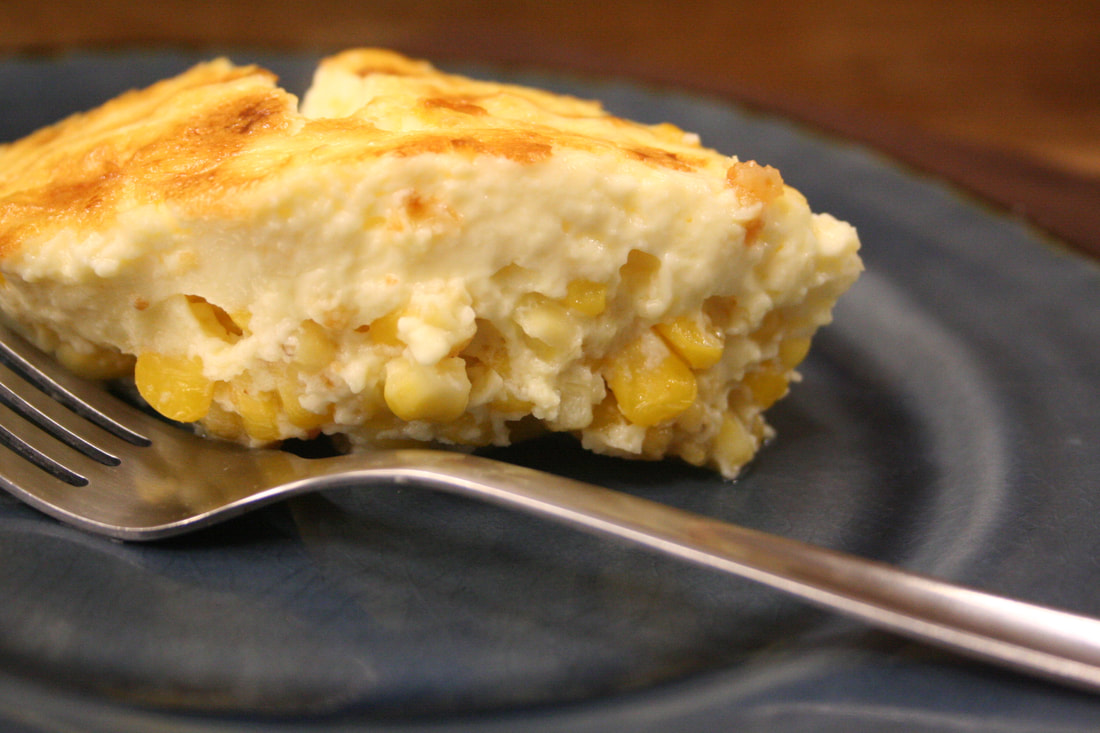
Yield - 6 to 8 Servings INGREDIENTS 1 pounds (about 3 cups) frozen sweet corn, thawed 1/2 cup granulated sugar 3/4 tsp kosher salt 4 large eggs 2 cups heavy cream Preheat your oven to 375 degrees. In a 2 quart casserole dish, combine thawed corn, sugar, and salt. In a bowl whisk together eggs and cream. Pour over the corn and sugar mixture, and stir well. Cover with foil. Bake for 75 minutes, covered. Uncover and cook for 15-20 minutes more uncovered. The top will be golden brown, and a knife poked into the center will come out cleanly. |
Dianeowns and operates, Type A Catering, a catering and hospitality company based outside Lexington, Kentucky. She loves food and entertaining, and jokes that she spends most Saturday's at weddings. ArchivesCategories |
 RSS Feed
Type A Catering & Events
|

|
|
Serving Lexington, KY - Nicholasville, KY - Georgetown, KY - Frankfort, KY - and Richmond, KY
Copyright 2024. All rights reserved.
Copyright 2024. All rights reserved.
Telephone859-619-3198
|
|